Snake plants are one of our favourite plants here at Fiddle and Thorn, they are pretty striking in their appearance and are also pretty easy to care for and propagate. There are several methods you can use and we will be going through each of them as well as pros and cons for each. You’ll also find plenty of FAQs to make sure you have everything you need along the way.
Why propagate a Snake Plant?
Before we get started you might be wondering why it’s beneficial to take cuttings from your plant? Well here are a few good reasons:
Create more plants for free!
This will multiply your plant collection without needing to spend any more money! They also make great gifts for friends and family if you have enough greenery in your home already.
Save a dying plant
If you accidentally overwatered, over-fertilised or mistreated your Snake Plant and it has started to die, sometimes the best way to save it is by taking the healthy leaves and using them to form new plants entirely.
Using a damaged leaf.
If one of the leaves on your plant has become sunburnt or scarred from taking a knocking then a great way to put this leaf to use is to propagate it. It’s a shame to throw away any leaves and this way it gets a second life.
To make your Snake Plant fit its environment.
If your plant has become too big for your space or you simply want to prune the shape a little then growing the leaves you cut off is a great way to stop them from going to waste.
Snake Plant Propagation Methods
There are 4 main methods you can use. Each come with their own set of difficulties, advantages and requirements so it’s important to figure out which is the best for you and your plant.
Propagating a Snake Plant

How to propagate a Snake Plant with cuttings in water
This is probably the easiest way as you won’t need any fancy tools, just some clean sharp shears/scissors and some spare time.
Choose a healthy leaf to propagate
A few scars or sunburn patches won’t affect the health of the leaf but avoid leaves that are fully turning yellow or show signs of pests as this will impact the health of the cutting and new plant.
Cut the leaf near the base of the plant
Using a clean, sharp knife or shears, cut the leaf off as close to the soil. Sharper, cleaner cuts have a better chance at growing healthy roots and also avoids too much damage to the mother plant. We recommend cutting a V shape into your leaf to increase the surface area for root growth.
If you want to you can also cut up the leaf into several horizontal sections and root each part to form multiple new plants. However, when doing this it is super important you don’t accidentally turn the cutting upside down as they will only root out of the bottom.
Let your cutting callous
We recommend leaving your newly cut Snake Plant leaf out of water for a few days so the end can callous over a little. This stops the leaf from rotting once it is placed into water.
It’s at this point that you may choose to use rooting gel to encourage faster root growth. It’s totally optional and down to personal preference.
Place the leaf in water
Next, you want to place your cutting(s) into water to encourage root growth. You want to cover the lower quarter of the cutting but no more as this may cause the leaf to root and become mushy. Use temperate water to avoid shocking or burning the plant.
Find a nice spot for your cutting
It’s important to find a place with enough but not too much sunlight. Bright but indirect is best as intense light will scorch the cutting but a lack of light will stunt any new root or leaf growth.
Replace the water regularly
This is a really important step – make sure you switch out the water every few days to stop it from stagnating as this can very quickly kill your leaf cutting!
Be patient!
It can take a little while for anything to start happening on your new cutting so you’ll need a lot of patience. After a few weeks (or sometimes 1-2 months) you should start to see some little roots forming at the bottom of the leaf. This is an indication that your propagation was successful and your cutting will soon be ready to be pot.
Pot into well-draining potting mix
Once the roots are several inches in length, you might decide your cutting is ready to be pot into fresh mix. Make sure you use a well-draining mix including perlite to aid aeration and drainage of the soil. This helps to prevent root rot which Snake Plants are quite sensitive to.
Positives of propagating your Snake Plant in water
- It’s really easy! This is probably the simplest method.
- If you use a clear vessel, you get to see the roots growing on your cutting which is always super cool.
Negatives of propagating your Snake Plant in water
- It can take a while for roots to start growing on your cutting. Sometimes you may be waiting several months to see any change.
- This method doesn’t work for variegated plants. Any dark margins or yellow edges will be lost on the new cuttings and they will most likely be solid green.
How to propagate a Snake Plant directly into potting mix
If you’re looking for an even more straightforward option, or just don’t like having to swap water out every couple of days, you can grow your cuttings directly into soil using this method.
Choose a healthy leaf
Like when using water, you want to make sure you use a relatively healthy leaf. Pests or diseases will persist on any new growth that comes from your cutting.
Cut the leaf near the base of the plant
Again you want to make sure you are using a clean, sharp knife to cut the leaf off as close to the soil. For this method, you will need to slice the leaf into smaller horizontal segments to create multiple new plants. Using one long leaf won’t work so well as there are no roots to keep it stable. It’s also important to remember what we mentioned before about not turning the cutting upside down as roots will only grow out of the natural bottom of the cutting.
Let your cutting callous
Leave your cutting out of water or soil for a few days to let it callous. It protects the leaf from rotting or taking up any bacteria found in the soil.
At this point in the process, you may choose to use rooting gel to encourage more root growth. It’s completely optional though as some horticulturists warn against potential damage to the leaf when used.
Pot the cutting into fresh soil
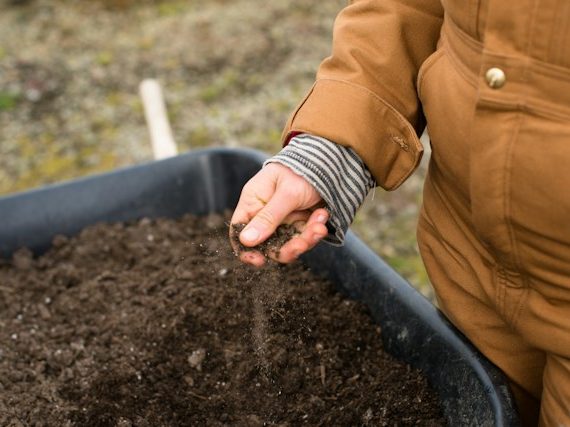
When choosing the right potting mix for your new cuttings, it’s important you choose a well-draining mix. Sometimes this comes labelled as succulent mix, other times you can just read the components of the mix to check it has perlite to aid drainage and aeration of the soil.
Find a nice spot for your Snake Plant cuttings to grow
Now that your various cuttings are potted nicely into fresh soil you want to find the right place for them to thrive. Bright but indirect sunlight is what your new cutting needs as intense light will scorch the cutting but a lack of light will stunt any new root or leaf growth.
Be patient!
It will take a long time for your new cuttings to show any signs of new leaves growing from the soil. It can take months before roots start to grow.
Positives of propagating straight into soil
- You can get quite a few new plants from just one leaf cutting!
- You can skip out the water part which avoids a few potential issues
Negatives of growing your Snake Plant cutting straight in soil
- As you can’t see the roots growing you won’t be able to spot any potential warning signs around root rot, growth or general unhappiness.
- It will take quite a long time to start seeing results.
- This method also doesn’t work for variegated plants. Any dark margins or yellow edges will be lost on the new cuttings and they will most likely be solid green.
How to propagate a Snake Plant through division of the mother plant
If your plant is getting pretty big and dense, using the division method is a great option as you will still be left with a healthy and full mother plant (as well as luscious new smaller plants).
Propagating your Snake Plant through division
Locate the various natural divisions
When looking for a part of the plant to divide it will become very obvious if there are various offshoots on your plant. They will hopefully be completely separate and growth will stem from the middle of each section. If this isn’t the case you will need your knife to slice down the middle of the plant.
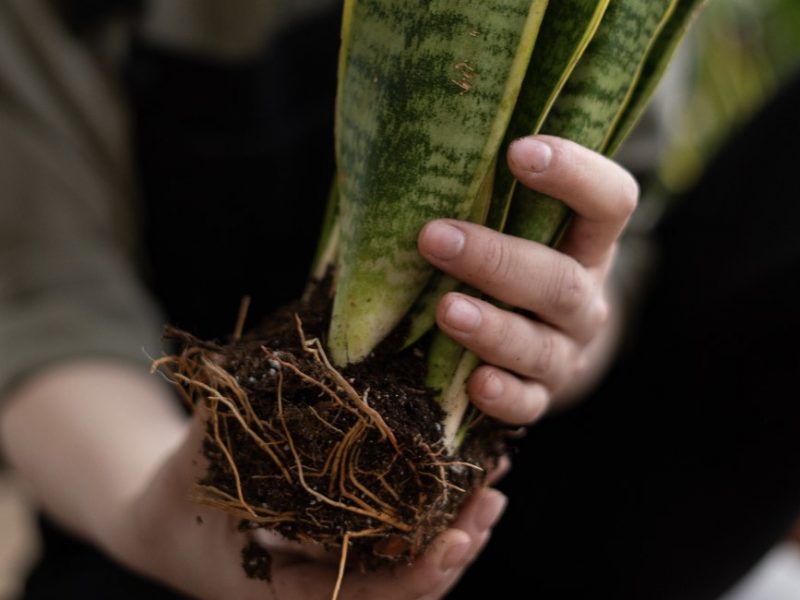
Take the plant out of the pot
Once you have located the various sections of the plant you will need to take your plant out of the pot so you can divide up the root system and leaves. Carefully lift the plant out of the pot, holding firmly on the leaves (Snake Plants are sturdy and can handle a bit of tugging).
Then shake off the potting mix around the roots so you can see the entire root system clearly. A good way to loosen the soil is to run your fingers through the roots to start to separate them. Don’t worry if a few break or fall out, this is normal and won’t cause any damage to your plant.
Separate your plant
You may have to trim off the odd root if they aren’t detangling easily but you should be able to carefully pull the sections apart from each other. It’s ok if you have to slice around the plant a little to separate them but just make sure that each part of the plant has a substantial amount of the root system.
Place in fresh potting mix
Pop your mother plant back into its original pot (or downsize if you have taken away a substantial amount of the original plant). Then pot your new plant(s) into fresh well-draining mix. If the roots aren’t very mature you may want to grow them in water for a few weeks but we tend to always go straight into potting mix when propagating Snake Plants through division.
Continue normal care
Now your plants are safely in their new homes you want to resume normal care.
Positives of the division method
- The results are pretty instant as you don’t have to wait for months for roots and leaves to grow.
- High chances of success as the plants already have a strong root system
- Keeps any variegation on the leaves, unlike the previous two methods.
Negatives of the division method
- You’ll need quite a big and mature plant to be able to get several larger plants from it.
- You don’t get the fun part of watching the roots and leaves grow.
How to propagate a Snake Plant through rhizomes
Rhizomes are little offshoots that grow from the mother plant underneath the soil. As they mature, they pop out and grow new plants. Rhizomes are a great way to propagate Snake Plants as they won’t harm or take away from the growth of your main plant.
Take your mother plant out of its pot
You might not know that your plant is growing rhizomes as they start off growing underneath the potting mix. If your plant is mature then you should be lucky! Remove your plant from its pot carefully and lay it on its side. Carefully look for light green/white rhizomes growing out from the mother plant.
Slice off the rhizome
Using your clean, sharp knife to remove the rhizome from the mother plant. Try to cut as close to the mother plant as possible to increase the chances of healthy root growth.
Let it callous over
Before popping your newly cut rhizome in fresh potting mix, we recommend leaving it in fresh air to callous over. This will stop the cutting from rotting or picking up any bacteria that may be in the potting soil.
At this stage, you may also choose to use a rooting hormone.
Pot in fresh well-draining soil
Now that your cutting has had the chance to callous over, you want to place it into a pot filled with fresh well-draining soil. Ingredients such as perlite will help aeration and draining in the soil which is key for your Snake Plant’s health.
Continue normal care
You’ve done it, your propagation is complete! Now your new Snake Plant rhizome is safely in its new home you want to resume normal care.
Positives of propagating your plant through division
- This is a quicker method compared to leaf cuttings and you will see new growth appear sooner.
- Keeps any variegation on the leaves as this is a direct offshoot from the mother plant.
- You don’t need to take any divisions or leaves away from your mother plant
Negatives of propagating your plant through division
- Less mature plants might not have rhizomes yet so you may not find any to remove.
Snake Plant Propagation FAQs
Here’s some answers to the most common questions we get on this subject, hopefully something here can help!
Can I reuse old potting mix when I propagate my Snake Plant?
Re-using potting mix from other houseplants is a big no-no. There can be a lot of nasty things hiding in your soil without you realising for a while such as pests or unhealthy bacteria. So reusing potting mix can easily transfer these pests or diseases from one plant to another. We always recommend using fresh potting mix for new plants to reduce the risk of transmission.
How long does it take for cuttings to grow roots?
It can be a slow game and it will take several weeks or even months to see the first sign of new roots. But patience pays off and soon enough you’ll have a whole load of tiny plant babies to care for.
What’s the best time of year to propagate?
It’s especially important when using leaf cuttings as they take such a long time to root and grow. Always start in spring time, after the last winter frost as this will give your plant plenty of warm summer months to grow.
What soil should I use?
Always use a well-draining potting mix. Sometimes it is labelled as cacti and succulent mix. But make sure it contains perlite as this is what aids drainage and stops your plant suffering from root rot.
Do I need to use a rooting gel or powder when propagating?
Using rooting hormone in the form of gel or powder is completely optional. They work to stimulate root growth on new cuttings, not only speeding up the process but also producing stronger roots.
But it’s not always the best thing to do as sometimes they can stimulate too much growth which harms the new plant cutting and slows down the process. So use sparingly to get the best results.
Can I use a grow light for my Snake Plant cuttings?
Grow lights are great to use when propagating houseplants as they provide ideal light conditions for young seeds and cuttings to boost growth. If you don’t have ample light in your home then this is definitely the way to go. You can also use them on mature houseplants over autumn and winter when they don’t get as much light so are a great investment for any plant parent!
Why is it important to use clean tools when propagating?
It’s important to clean your tools before and after contact with any plant to stop cross-contamination between your plants. Scissors, knives and shears can transfer pests and diseases across plants that you might not even realise are there.
Another crucial reason to get in the habit of clean your tools after touching plants is that many houseplants are toxic, including the Snake Plant. Therefore you want to make sure that there is no trace of the plant on your tools as this can be harmful to you and anyone who might come into contact with your tools.
Do I need to fertilise my Snake Plant cuttings?
One thing you don’t need to worry about is remembering to fertilise your new cuttings. Fertiliser can actually slow down growth as you are providing nutrients straight to the plant which discourages root growth. Wait at least a year before fertilising as doing it too early can cause various health issues for your new plants.
How often do I need to change out the water when propagating in water?
If you have chosen to grow your cuttings in water then it’s really important you switch out the water every 2-3 days. This prevents it from stagnating and harming your new leaf cutting.
How do I know what method of propagation to use?
Choosing what method to use can be tricky because you obviously want the best chance of success. It all depends on how mature your plant is and whether there is a leaf you want to cut off or if your plant has rhizomes yet. Each plant is different so you just have to go through the advantages and disadvantages we listed above to see which works for you.
Common Problems when Propagating Snake Plants
Although on paper, it’s a simple process, sometimes it just doesn’t work out as expected. Here’s some advice on the most common issues we come across from time to time.
Why isn’t my Snake Plant cutting growing roots?
Patience is the number one thing you need as the process is very very very slow. It is totally normal for it to take weeks and months for anything to actually happen so as long as your cutting looks healthy and isn’t yellow, brown or mushy, then it should still grow roots at some point.
Why is my cutting turning mushy?
If your cutting has started to turn soft and mushy then chances are it is being overwatered. Unfortunately, it is often too late to save that part of the cutting once it is soft so we recommend trimming it away and starting again with the healthy part of the cutting.
If you are propagating your Snake Plant cutting in water then make sure it has time to fully callous over before popping in the water as this will prevent leaf rot.
Why is there a weird film on my cuttings in water?
It’s totally normal for a slightly slimy layer to form around your cutting and its roots in water. This is totally normal and nothing to worry about. We recommend giving your cutting a quick rinse each time you change out the water to remove this but it shouldn’t harm your chances of success if you are regularly switching out the water.
Propagating doesn’t have to be super difficult once you have chosen your preferred method. But one thing you have to be prepared for is for nothing to happen for weeks and weeks. But with the right care and the right environment, your Snake Plant should start to grow roots and new leaves soon and it will be well worth the wait.
Check out our Snake Plant care guide for more info on how to take care of your plants as they mature.